Intro
This challenge is really simple as the password of that application is stored in cleartext. It can be found with strings, but we will also use Ghidra to confirm that this is actually the password we’re after and talk about the basics of using Ghidra to reverse engineer binaries.
Analyzing the binary using strings and file
A good starting point to analyze a binary is to run file against it. It will inform us about the file type and any other information related to that.
┌──(kali㉿kali)-[~/ctf/industrial-intrusion/reverse2]
└─$ file access_granted
access_granted: ELF 64-bit LSB pie executable, x86-64, version 1 (SYSV), dynamically linked, interpreter /lib64/ld-linux-x86-64.so.2, BuildID[sha1]=e9097542628490c31042bb6a07667b49f6d44c39, for GNU/Linux 3.2.0, not stripped
From this we can learn that we’re dealing with a 64-Bit Executable Linux File. LSB (Least significant byte) determines the byte order.
Info: LSB vs MSB
- LSB (Least Significant Byte):
- Indicates a little-endian format
- Byte order: lower-order bytes come first
- Common on x86 and x86-64 architectures
- MSB (Most Significant Byte):
- Indicates a big-endian format.
- Byte order: higher-order bytes come first
- Found on different computer architectures like PowerPC, SPARC, or older embedded systems (less common)
- Not compatible with little-endian systems
We can also run strings on a binary. strings will return human readable text that is stored in the binary that has a minimum contiguous length of n characters.
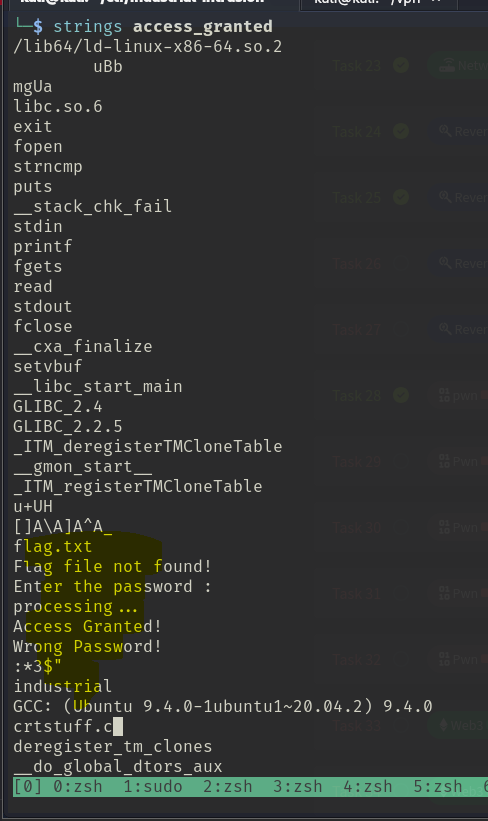
We can see some interesting strings here like flag.txt, Enter the password : and Access Granted!. If the application stores a secret like a password in cleartext instead of creating it dynamically during runtime, we might be able to find the password / secret this way. Could it be industrial? Let’s check…
Analysis with Ghidra
Ghidra is a really powerful tool built by the NSA (yes, the NSA). It can be used to reverse engineer lots of binaries and even patch them. If you’re new to Ghidra, I suggest you just try to play around with it. Analyze a few simple and less complex binaries, or maybe even binaries you coded yourself to see what they look like within Ghidra. This tool is really powerful and can do a lot of stuff. What we’re about to do only scratches the surface of what’s possible.
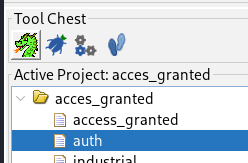
First, start Ghidra, create a new project and add your binary to your project. Open the code browser tool by dragging the binary from your project onto the green dragon icon.
Lets take a tour through the interface
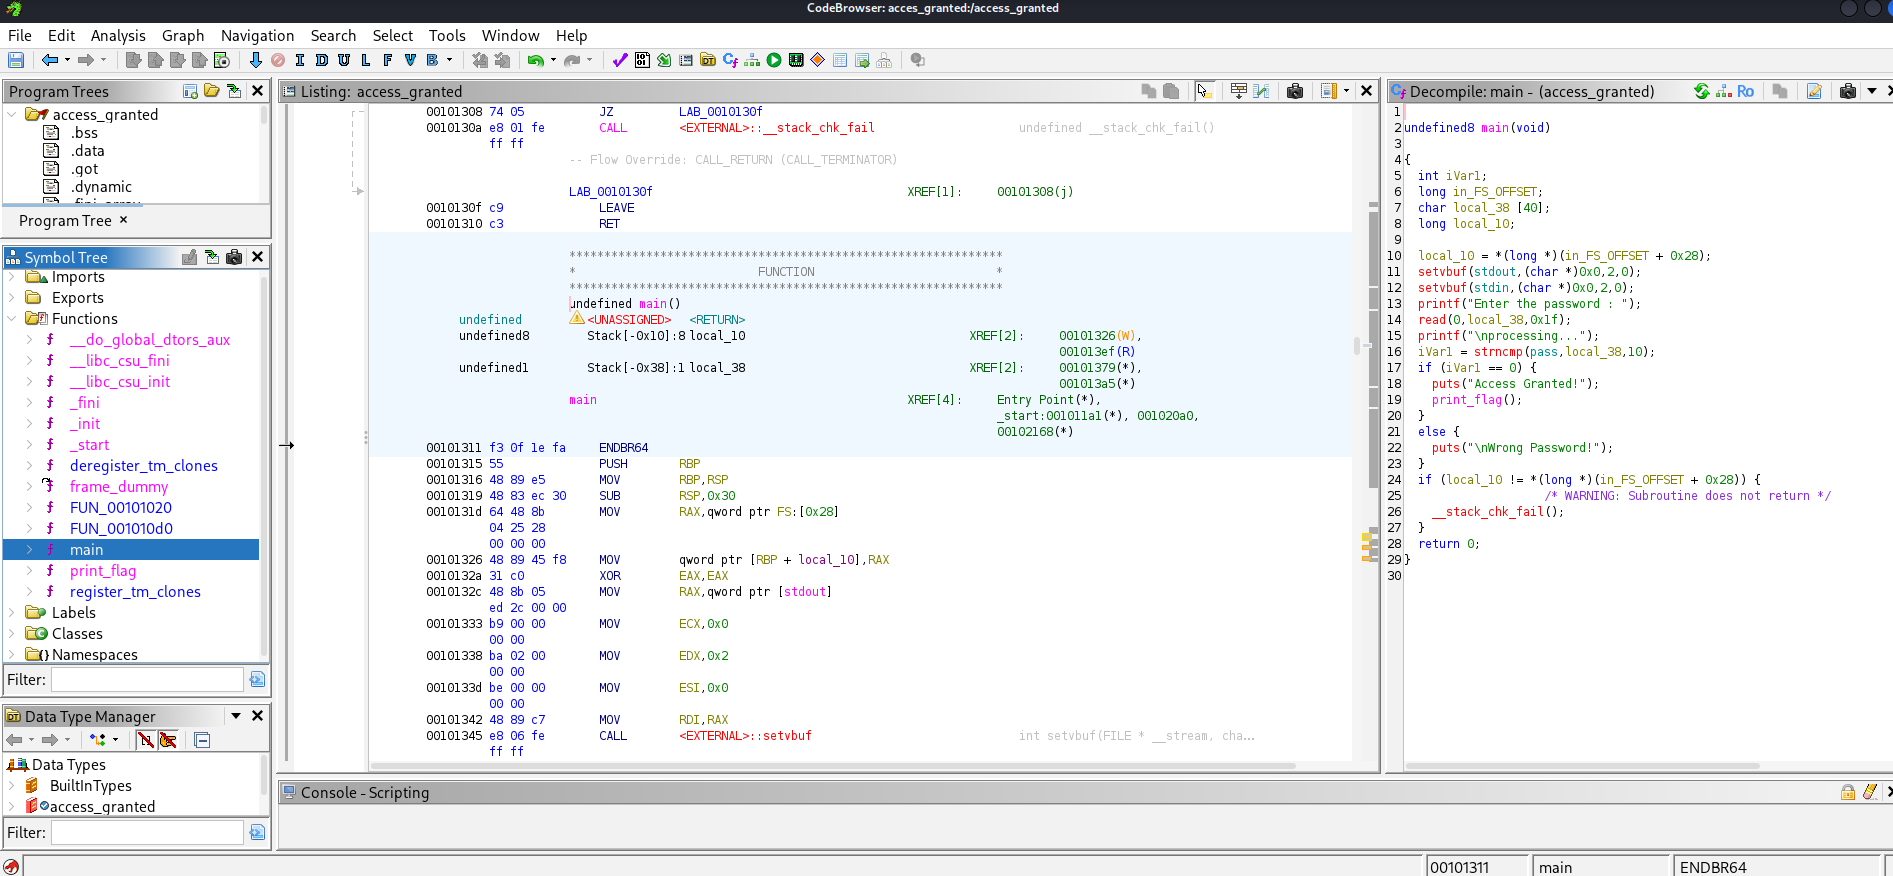
Within the main view, you can see the assembler code in the middle pane. Decompiled functions are displayed on the right hand side. This is really useful, as assembler can be hard to understand if you’re not familiar with it. If you know some basic C++ / C, the code on the right panel should look familiar to you.
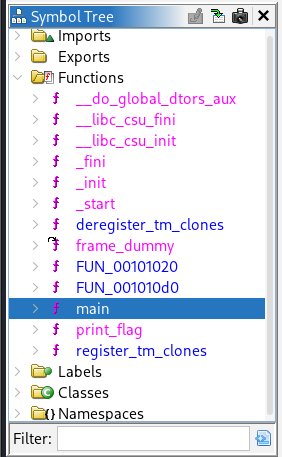
On the left panel you can see a section called Symbol tree. This is really useful, as you can expand the Functions folder. Within this folder you can see all the functions that Ghidra managed to identify. If you know a bit of coding, you should be familiar with the concept of functions. The program usually has a function called main, which is the starting point of most applications. This means, whenever you start that binary, it will start by calling the main() function. If the program has more functions like for example login() or checkPassword() or print_flag(), we can see them within the Symbol Tree section and jump to their declaration by double clicking on them. This makes navigation through the assembler code much easier.
Unraveling the mystery of the binary
Below is the code of the main() function. If you’re not familiar with any of this, don’t get discouraged by the code - it’s really simple once you get the basics. We can see several printf() calls with the strings we saw earlier (like “Enter the password : " or “Access Granted!”). After the the program executes printf("Enter the password : "); in line 13, it reads the user input at line 14 and stores it in a variable called local_38. This variable is declared in line 7 with char local_38 [40];. It is a char array with a length of 40.
undefined8 main(void)

{
  int iVar1;
  long in_FS_OFFSET;
  char local_38 [40];
  long local_10;

  local_10 = *(long *)(in_FS_OFFSET + 0x28);
  setvbuf(stdout,(char *)0x0,2,0);
  setvbuf(stdin,(char *)0x0,2,0);
  printf("Enter the password : ");
  read(0,local_38,0x1f);
  printf("\nprocessing...");
  iVar1 = strncmp(pass,local_38,10);
  if (iVar1 == 0) {
    puts("Access Granted!");
    print_flag();
  }
  else {
    puts("\nWrong Password!");
  }
  if (local_10 != *(long *)(in_FS_OFFSET + 0x28)) {
                    /* WARNING: Subroutine does not return */
    __stack_chk_fail();
  }
  return 0;
}
Next, in line 16, it calls strncmp(pass,local_38,10) to compare the contents of pass and local_38. If they’re equal, this function returns an integer value of 0. The return value gets stored in iVar1. The code then checks the value of iVar1 and if it’s 0, it will call a function to print the flag and output “Access Granted!”.
Also, Ghidra does a good job at highlighting related things. So, if you select code within the decompiled code panel, it also highlights the corresponding assembler code in the middle:

Of course, we want to know what our input gets compared against (the value of pass). Take a look at the assembler code view in the middle column:

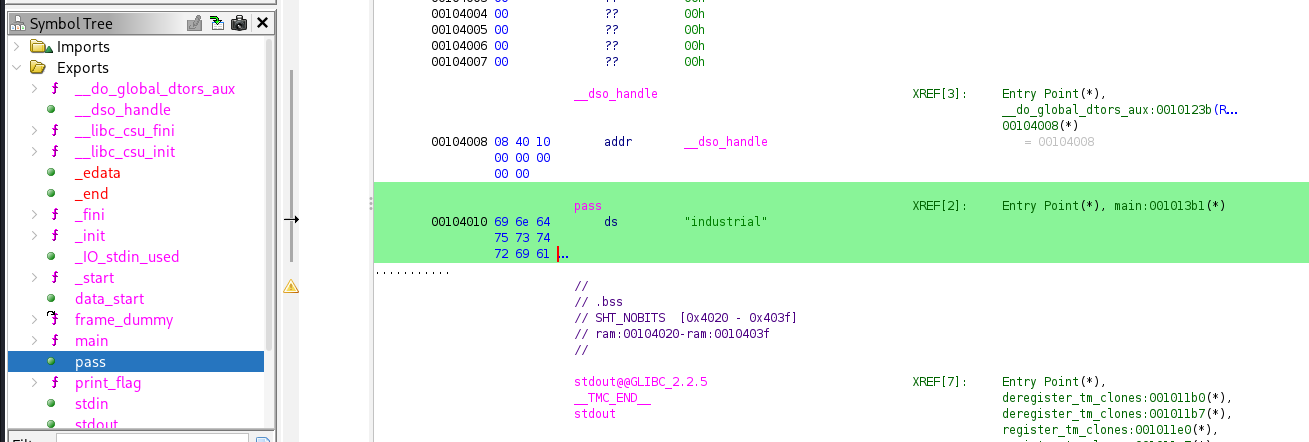
Ghidra displays corresponding strings within that assembler view. We can see, that in the line with [pass] there is an annotation, saying = "industrial. This confirms our initial suspicion. The password we’re after is what we saw earlier with strings.
We can also double click on pass or take a look into the Exports section on the left hand side, and find pass there.
Just execute the binary and try industrial. The application prints “Access Granted!”. Since this is CTF, all we have left to do is to connect to the online service with nc 10.10.14.29 1234, enter the password and get the flag.